Plaster of Paris (POP) – An orthopedic nurse is a nurse who specializes in treating patients with bone, limb, or musculoskeletal disorders. Nonetheless, because orthopedics and trauma typically follow one another, head injuries and infected wounds are frequently treated by orthopedic nurses.
Ensuring that patients receive the proper pre-and post-operative care following surgery is the responsibility of an orthopedic nurse. They play a critical role in the effort to return patients to baseline before admission. Early detection of complications following surgery, including sepsis, compartment syndrome, and site infections, falls under the purview of orthopedic nurses.
Plaster of Paris (POP)
History of plaster of Paris:
The name of plaster of Paris originated from an accident to a house built on deposit of gypsum near the city of paris .The house was accidentally burnt down When it rained on the next day, it was noted that the footprint of the people in the mud had set rock hard Mathysen a Dtch surgeon first used POP in orthopedics in 1852.It is commercially available since 1931.
Define plaster of Paris:
Plaster of paris is a type of of material based on calcium sulphate hemihydrates, and created by heating gypsum to about 150 degree celcious.
Or
The material is so called because it was originally made from large deposits of natural mineral in Montmartre in Paris. Gypsum, the mineral element of plaster of pahs consists of a calcium sulphate (CaSO4.2H2O).
(Ref-SN Nanjunde Gowda’s “Foundations of Nursing” 1″ edition page)
Or
Plaster of Paris (POP) is made up of hemihydrated calcium sulphate. When water; added, solid hydrated calcium sulphate forms due to exothermic reaction. POP powder can be impregnated with roller bandage. Over that, roller bandage is pla and moulded as required before it sets and solidifies.
(Ref-Sriram Bhat M “SRB’s Surgery for Nurses” 1″ edition pag, P-431)
Types of POP:
T her are 2 types of POP:
3) Indigenous :It is prepared from ordinary cotton bandage role smeared with POP powder.
4) Commercial: It consist of rolls of muslin stiffened by starch, POP powder, and accelerator substance like alum.
(Ref-John Ebnezar’s “Textbook of Orthopedics” 4 edition,P-61)
Plaster of Paris an ideal splint, because:
1. It is cheap.
2. It is easily available.
3. It is comfortable.
4. It is easy to mould.
5. It is quick setting.
6. It is strong and light.
7. It is easy to remove.
8. It is permeable to radiography.
9. It is permeable to air and hence underlying skin can breathe.
10. It is noninflammable.
(Ref-John Ebnezar’s “Textbook of Orthopedics” edition,P-61)
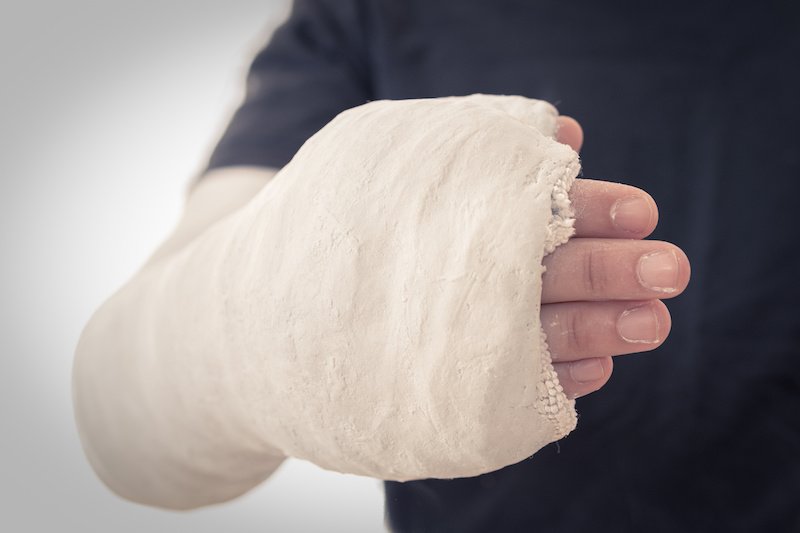
Forms of plaster of Paris (POP): POP is used in 4 forms,
1) Slab: It is made of half of POP and half by bandage roll. It is a temporary splints used in the initial stages of fracture treatment and during first aid. It is useful to immobilize the limbs postoperatively and in infections.
2) Casts: Here POP roll completely encircle s the limb. It is use to a definitive form of fracture treatment and correct deformity.
3) Spica: It is encircle the part of the body. e.g. Hip spica for fracture around the hip. Thumb spica for fracture around the thumb.
4) Functional cast brace: This is used to fracture tibia after initial immobilizations.
(Ref-John Ebnezar’s “Textbook of Orthopedics” edition P-61)
Equipment needed during applying POP of a patient:
1) Required number of plaster bandage.
2) Container or basin With warm water.
3) Knife.
4) Scissor.
5) Measuring tape.
6) Mackintosh
7) Apron or gown
8) News paper or floor protecting material.
9) Common salt
Precaution for plaster of Paris patient:
A) After applying the patient is observed for any-
1) Severe pain.
2) Tenderness.
3) Numbness.
4) Pallor.
5) Duskiness.
6) Oedema distally.
B) It signifies that POP is compressing the vessel and requires immediate removal and application of new POP.
C) POP is maintained until fracture unites.
D) If external wound has to be inspected small window cut in the POP over wound area is made to visualize the wound.
(Ref-Sriram Bhat M “SRB’s Surgery for Nurses” 1″ edition p-431)
Rules of application of POP casts:
1) Choose the correct size, 8 inches for the thigh, 6 inches for the leg, and 4 inches for the forearm.
2) A joint above and a joint below should be included. Accordingly, we have an above elbow or below elbow, POP cast or slab and above knee or below knee POP cast or slab.
3) Good quality of plaster powder and gauze is collected. The gauze is cut into required width and length.
4) Provide adequate light in the plaster room.
5) Explain the patients what is going to be done. So that they are mentally prepared.
6) Remove any tight fitting cloths, ornaments from the patients.
7) Stand the right side of the patients. Hold the limbs to be plastered in its functional positions. Functional position varies for
| Shoulder joint | 90 degree abduction |
| Elbow joint | 90degree flexion and supination. |
| Wrist joint | 30-45 degree of dorsiflexion. |
| Fingers | i) 90 degree flexion at MP (Metacarpo-phalangeal) joint. |
ii) 90 degree extension at IP (Interphalangeal joint | |
| Knee joint | 0 degree extension. |
| Ankle joint | 90 degree dorsiflexion. |
8) Try to Fixing the bone in correct position by manual traction or applying pressure on the injured part.
9) Unrape the required number of bandages and keep ready for immersion in a bowl of clean water.
10) Immerse the bandage until the bubbles come out( 3 sec).
11) Gently squeeze the POP bandage and apply it within 3-4 minutes.
12) Do not give pressure on the Cast and never try to mold the cast after 5-6 minutes.
13) When the cast is dry, prepare a sling and put in it.
14) The plaster should just snugly fit and should not be too tight or too loose.
(Ref-John Ebnezar’s “Textbook of Orthopedics” edition,P-62+ BT Basavanthappa, Orthpaedic for nurses, P-110,111)
Stages of plastering:
A) 1″ stage: Involves application of POP slab or cast.
B) 2nd Stage (Cast setting stage): This is the stage of changes of POP to gypsum and is defined as the time
taken to form a rigid dressing after contact with water.
C) 3rd stage (Green stage): This is the just set wet cast. D) 4th Stage (Cast drying): By evaporation of excess water when the cast dries this results in a mature cast with the cast dries this results in mature cast with multiple air pockets through which skin breath.
[Ref-John Ebnezar’s “Textbook of Orthopedics” edition,P-62]
Complications of plaster of Paris (POP):
A) Due to tight fit:
i) Pain.
ii) Pressure sores.
iii) Compartmental syndromes.
iv) Peripheral nerve injuries.
v) Cast syndrome.
B) Due to improper application:
i) Joint stiffness,
ii) Plaster blister and sores.
iii) Breakage.
C) Due to plaster allergy: Allergic dermatitis
(Ref-John Ebnezar’s “Textbook of Orthopedics” edition,P-62)
Nursing care prior to application of POP:
1) Take written consent wherever necessary.
2) Explain to patients clearly what is going to be done so that they are mentally prepared. This is the best way to ensure patients compliance.
3) Clean the limb in question preferably with soap solution.
4) Be gentle while scrubbing the injure area. Rough handling may cause pain and make the patients 6un cooperative.
5) Removes of tight fitting clothes.8Remove ornaments like bangles, rings, watch, etc before application of plaster.
6) Keep appropriate sized plaster rolls, cotton rolls, clean bandage rolls and stockinettes ready.
7) Make the patient sit comfortably on a stool or table in a well ventilated and bright room.
8) To prevent soiling of the patients clothes and the ground put rubber sheets.
9) Pad pressure points adequately to prevent future sores.
(Ref-BT.Basavanthappa, Orthopedics for nurses, I” edition, P-109)
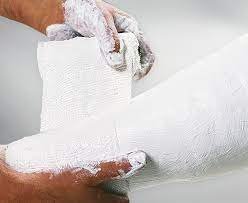
Procedure of POP application:
1) Intimate the patients what you are going to do.
2) Remove any ornaments etc, if worn by patient.
3) Shave clean, and dry, if area of application is hairy.
4) Spread newspaper on floor or any other floor protecting material, to protect the floor for spilling.
5) Add salt 4 gm in 1 liter water.
6) Wrap cotton over the area of application over the skin evenly covering the whole skin or the area to be covered by plaster.
7) Place plaster bandages in warm water lying flat and evenly till water are completely soaked in. Air bubbles will coming out when you dip the plaster bandage in water.
8) Keep the plaster bandage under water till air bubbles stop coming out.
9) Lift and compress lightly to removed excess of water.
10) Now hold the bandage in left hand and the free ends at right hand.
11) Apply the POP bandage on the selected area smoothly in circular motions beginning distally and proceeding proximally. Never give tight during application.
12) Never reverse a plaster bandage during application.
13) While applying the first one dip the second POP bandage and apply quickly within 3-4 minutes.
14) Running the rolls backward and forwards or up wards and down wards until sufficient strength is obtained
15) When complete plaster bandages are applied gently spread your palm of hand to make the smooth surface of plaster.
16) Clean the skin of plaster with warm water.
17) Do not mould the cast after 5-6 minutes. Advice to avoid weight bearing activity upto 48 hours.
18) Observes complications of POP e.g. pain, itching, burning sensation. Etc.
(Ref-Lippincott, Adult orthopaedic Nursing, P-115,116)
Tight cast: It is one of hazards of plaster where the patients complaints of pain immediately after application of plaster.
Reorganization of tight plaster:
1) Passive finger stretch causes pain.
2) Distal limb oedema
3) Bluish discoloration of the fingers and toes.
4) Overlapping of the fingers and toes.
5) Feeling tightness of the area of application.
6) Feeling of numbness of limb.
(Ref- BT. Basavanthappa, Orthopedics for nurses,l” edition, P-112)
Management of this case:
1) Do a passive fingers stretch of patients.
2) If pain occurs take decision of plaster removal.
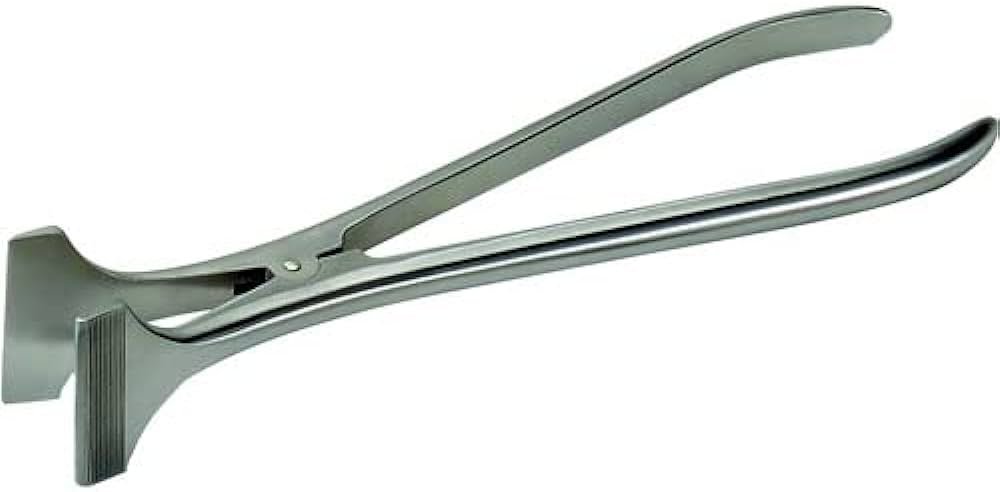
3) Cut the plaster by the plaster cutting saw.
4) Do not try to cut over the bony prominence directly.
5) When 2/3 layers of the plaster cutting is completed take a plaster spreader to spread the cutting edge.
6) Then cut the rest of the plaster carefully and remove it.
7) Observe signs for any blister formation. 8) Assess neurovascular status of the limb.
9) And consult with doctors.
(Ref-Lippincott, Adult orthopaedic Nursing,Page-119)
Instruction after application of POP:
While sending the patients home after application of POP, do not forget to give the following instructions,
1. To keep the plaster neat and clean.
2. While taking bath, cover the plastered area with a water proof material .e.g. polythene.
3. It is better to sponge bath instead of a regular bath.
4. Avoid wet of plaster.
5. Avoid weight bearing activity without doctors order.
6. Do not walk on the plastered limbs.
7. Use of crutch during walking. And always raise the foot during walking.
8. Keep the plastered limb elevated while sleeping or sitting to prevent dependent edema.
9. Do not pass thin sticks or sharp instrument between the plaster and skin scratch or remove them.
10. Exercise the fingers of plastered limb.
11. Report or consult with doctors if followings are noticed-
- If cracks or loose plaster.
- If there is any discharge.
- If fingers become or toes become numb or difficult to move.
- Swellings or blueness of the fingers.
12. No diet restriction unless specified by the doctors.
13. Encourage to intake more calcium and vitamin containing food.
14. Instruct them to report back to the doctors immediately if tight plaster. 15. Day by day functional activities should be carried out with the unaffected.
16 . Active exercise to all the unaffected joints in the limbs.
17. For the joints immobilized within a plaster, isometric exercise are recommended.
(Ref- BT.Bassvanthappa, Orthopedics for nurses, I” edition, P-113)
Nursing management of patients of Long arm full plaster (LAFP):
A) Assessment:
1) Assessment of neurovascular status of patients.
2) Check for swelling.oedema,numbness blueness of fingers.
3) Check the positioning of the limb
4) Assess the level of pain- location, duration and severity in plastered site.
5) Observe the mental status of the patients.
B) Nursing diagnosis:
1) Pain and discomfort related to trauma and soft tissue injury.
2) Impaired physical mobility related to instability of radius and ulna and cast.
3) Potential self care deficit related to the inability to use the affected arm.
4) Potential impaired skin integrity related to the cast.
5) Anxiety related to knowledge deficit about cast, its care and rehabilitation of the fracture.
C) Nursing intervention:
1) Reducing pain:
- Keep the patients in comfortable position.
- Elevate the affected limb: Sling used to hold the limb elevated and correct position.
- Apply ice bag at the fracture site (along the side of the thumb but not on the top of the thumb).
- Give analgesics according to doctors order.
2) Increase mobility:
a) Positioning:
- Keep the arm elevated while in bed, sitting, walking.( Arm cast).
b) Exercise: Explain the benefit of exercise of a cast.
i. Taught to exercise in the joints above and below cast.
ii. Teach the patients isometric exercise first on the unaffected limb.
iii. Teach the patients to frequent movement of finger exercise.
iv. Encourage to finger exercise that increased blood flow to area and reduce pain.
v. Fully extend the fingers and spread them into abduction. vi. Flex the fingers by touching the palm with the finger tips.
vii. Flex the metacarpophalangeal joints by attempting to touch the front of the wrist.
viii. Approximate the tip of the thumb to each fingers in turn the thumb must also be exercised.
c) Ambulation:
- Patients assistance in getting out of bed.
- Avoid weight bearing activity on the affected limb.
5) Improve self care:
a) Assist the patients in daily activities.
b) For bathing patients cast is covered by plastic bag.
c) Assisting with buttoning shirt.
d) Assist in bowel and bladder care.
6) Maintaining skin integrity:
a) Observe rough edge of the cast.
b) If rough edge cut it carefully to prevent skin cut.
c) Observe skin for blistering, ulceration, and burn of the casted hand.
d) Check for tight cast which may cause pressure sore on skin and discoloration of the fingers.

7 ) Improve patients knowledge regarding cast care:
a) To keep the plaster neat and clean.
b) While taking bath, cover the plastered area with a water proof material.e.g. polythene.
c) Keep the plastered limb elevated while sleeping or sitting to prevent dependent edema. d) Do not pass thin sticks or sharp instrument between the plaster and skin scratch or remove them.
e) Exercise the fingers of plastered limb.
f) Report or consult with doctors, if followings are noticed-
- If cracks or loose plaster.
- If there is any discharge.
- If fingers become or toes become numb or difficult to move.
- Swellings or blueness of the fingers.
g) Encourage to intake more calcium and vitamin containing food.
h) Instruct them to report back to the doctors immediately if tight plaster. i) Day by day functional activities should be carried out with the unaffected.
j) Active exercise to all the unaffected joints in the limbs.
k) For the joints immobilized within a plaster, isometric exercises are recommended.
(Ref-Lippincott, Adult orthopaedic Nursing, P-124,125)
A. Type of cast: Long arm full plaster. (LAFP).
B. Please see above.
C. Please see above.
Immobilize the casted limb :
It depends upon the age of the patients site and configuration of the fracture,
| Fracture type Bone type | Spiral or oblique fracture | Transverse fracture | ||
| Children | Adults | Children | Adults | |
| Long bone of the Upper Limb | 3 weeks | 6 weeks | 4 weeks | 8-10 weeks |
| Long bone of the Lower Limb | 6 weeks | 12 weeks | 8-12 weeks | 16-20 weeks |
Read more: